تغییر قالب ها در یک قالب گیری با دمش ما چین نگهداری روتین است که مستقیما بر زمان کارکرد تولید و کیفیت بطری شما تأثیر می گذارد. چه از دمنده نیمه خودکار PET شرکت JNDWATER استفاده کنید و چه از دستگاه قالب گیری دمی کاملا خودکار، فرآیند تعویض قالب بر اساس همان اصول اصلی است. این راهنما شما را با کل فرآیند — آماده سازی، برداشت، نصب، تست و عیب یابی — بر اساس ۱۷+ سال تجربه میدانی در تأمین ۹,۰۰۰+ خط تولید به ۱۲۵+ کشور آشنا می کند.
آماده سازی ایمنی قبل از تغییر قالب
آمادگی مناسب غیرقابل مذاکره است. نادیده گرفتن مراحل ایمنی می تواند باعث آسیب، آسیب به تجهیزات و زمان های پرهزینه توقف شود.
هشدار: هرگز هنگام روشن بودن دستگاه یا تحت فشار بودن سیستم هیدرولیک، سعی نکنید قالب را تعویض کنید. همیشه روند قفل کردن/برچسب خوردن (LOTO) مرکز خود را دنبال کنید.
ابزارهای مورد نیاز
| دسته بندی | ابزارها | هدف |
| ابزارهای دستی | آچار گشتاور، کلیدهای آلن، پیچ گوشتی ها، چکش برنجی | شل شدن/سفت کردن پیچ ها، تنظیمات |
| بلند کردن | جرثقیل سقفی، بالابر یا تجهیزات قالب گیری | مدیریت ایمن کپک |
| تمیزکاری | پارچه های حلال، بدون پرز، هوای فشرده | تمیزکاری حفره و کانال |
| روان کننده ها | گریس با دمای بالا، عامل آزادکننده کپک، روغن زنگ زدگی | روانکاری پین راهنما، محافظت |
| تجهیزات حفاظت فردی | دستکش های مقاوم در برابر حرارت، عینک محافظ، چکمه های پنجه فولادی | حفاظت شخصی |
فرآیند خاموش کردن ماشین
- توقف تولید و اجازه می دهد نوارهای بخاری زیر ۵۰ درجه سانتی گراد (۱۲۲ درجه فارنهایت) خنک شوند.
- کاهش فشار سیستم هیدرولیک و بررسی کنید که گیج صفر را نشان می دهد.
- قفل کردن/تگ اوت — برق اصلی را قطع کنید و قفل را فعال کنید.
- آب خنک کننده تخلیه از کانال های قالب قبل از جدا کردن خطوط استفاده کنید.
مرحله ۱ — حذف قالب قدیمی
ابتدا هر اتصال (خطوط خنک کننده، شلنگ هوا، سیم کشی بخاری، ترموکوپل) را با نوار رنگی یا برچسب های شماره دار برچسب بزنید — این کار از سردرگمی هنگام نصب مجدد جلوگیری می کند. قبل از قطع ارتباط عکس بگیرید.
پیچ ها را به صورت مورب شل کنید
پیچ های نصب را به تدریج شل کنید در الگوی مورب (ستاره ای) — هرگز به صورت متوالی در اطراف پیرامون. این کار مانع گیر کردن قالب روی پین های راهنما می شود. هر پیچ را یک چهارم دور شل کنید و سپس به پیچ مخالف بروید تا همه دست ها شل شوند. پیچ ها را در یک ظرف برچسب دار نگهداری کنید.
نکته حرفه ای: رایج ترین اشتباه میدانی که می بینیم، شل کردن پیچ ها به صورت دایره ای است. این کار باعث جابجایی نامنظم قالب و فشار دادن پین های راهنما می شود. همیشه به صورت مورب کار کنید.
کپک قدیمی را بلند و ذخیره کنید
قالب های دمشی می توانند بین ۵۰ کیلوگرم تا بیش از ۱۰۰۰ کیلوگرم وزن داشته باشند. هرگز دستی بلند نکنید. پیچ های چشمی بالابر را به نقاط مشخص شده وصل کنید، مطمئن شوید زاویه بند از عمود زیر ۶۰ درجه است و ابتدا ۱ تا ۲ سانتی متر بلند کنید تا اتصال را بررسی کنید. در صورت نیاز، با چکش برنجی به آرامی ضربه بزنید تا مهر و موم را بشکنید — هرگز چکش فولادی. قالب را روی پالت چوبی یا زیرانداز لاستیکی نگهداری کنید، هرگز مستقیما روی بتن قرار ندهید.
مرحله ۲ — بررسی و آماده سازی قالب جدید
قبل از نصب، مطمئن شوید قالب جدید با دستگاه شما مطابقت دارد. عدم تطابق به هر دو کپک و دستگاه آسیب می زند.
| بررسی | چه چیزی را باید بررسی کرد | اگر اشتباه باشد، ریسک کن |
| نیروی گیره ای | کپک به کمتر از حداکثر دستگاه نیاز دارد | فلش، اورلود |
| ارتفاع قالب | دستگاه ها را در محدوده روشنایی روز قرار می دهد | نصب نمی شود |
| الگوی نصب | سوراخ های پیچ با صفحه مطابقت دارند | تناسب ناایمن |
| طول ضربه | امکان باز شدن کپک | شکست در جداسازی قالب گیری |
| کانال های خنک کننده | قطر با اتصالات مطابقت دارد | خنک کنندگی ضعیف |
حفره و کانال های خنک کننده را با حلال و هوای فشرده تمیز کنید. یک ناخن را روی خط جداسازی بکشید — باید کاملا صاف به نظر برسد؛ هر خراشی باعث فلش می شود. یک لایه نازک از گریس دی سولفید مولیبدن (MoS2) برای هدایت پین ها و بوش ها بزنید. از روغن کاری بیش از حد خودداری کنید که باعث جذب خاک می شود.
مرحله ۳ — نصب قالب جدید
قالب را با پین های راهنما هم راستا کنید و دو پیچ مورب را با دست سفت کنید، سپس بقیه را وارد کنید. این مهم ترین مرحله است — گشتاور نامناسب باعث مشکلات کیفیت پس از تعویض می شود.
| پاس | سطح گشتاور | عملیات |
| 1 | ۳۰٪ مشخصات | همه پیچ ها را به صورت ضربدری محکم کنید |
| 2 | ۷۰٪ مشخصات | همان الگو را سفت کن |
| 3 | ۱۰۰٪ مشخصات | گشتاور نهایی با آچار نوع کلیک |
احتیاط: همیشه نمودار گشتاور ماشین خود را دنبال کنید. مقادیر معمول از ۸۰ نیوتن متر (M12) تا ۳۴۰ نیوتن متر (M20) متغیر است. گشتاور نادرست می تواند باعث خرابی پیچ در حین تولید شود.
خطوط را به ترتیب معکوس جدا کردن (برق → هوا → آب) با استفاده از برچسب ها و عکس خود متصل کنید. آب را باز کنید و همه اتصالات را برای نشتی بررسی کنید. دستگاه های LOTO را جدا کنید و برق را بازیابی کنید.
مرحله ۴ — تست و کالیبره
یک اجرا کن چرخه تست بدون بار ابتدا برای تأیید تراز بدون ماده. سپس ۵ تا ۱۰ بطری نمونه با سرعت کاهش یافته تولید کرده و موارد زیر را بررسی می کند:
- فلش — ماده اضافی در خط جداسازی (پیچ یا مشکل فشار)
- ضخامت ناهموار دیواره — نسبت کشش یا مسئله دما
- تاب خوردن — مسئله زمان بندی خنک کننده یا دمش
فشار دم، دما و زمان بندی را تنظیم کنید تا نمونه ها یکنواخت شوند. تمام پارامترها را در یک لاگ تغییر ثبت کنید تا تغییر بعدی سریع تر شود.
تغییر قالب بر اساس نوع ماشین
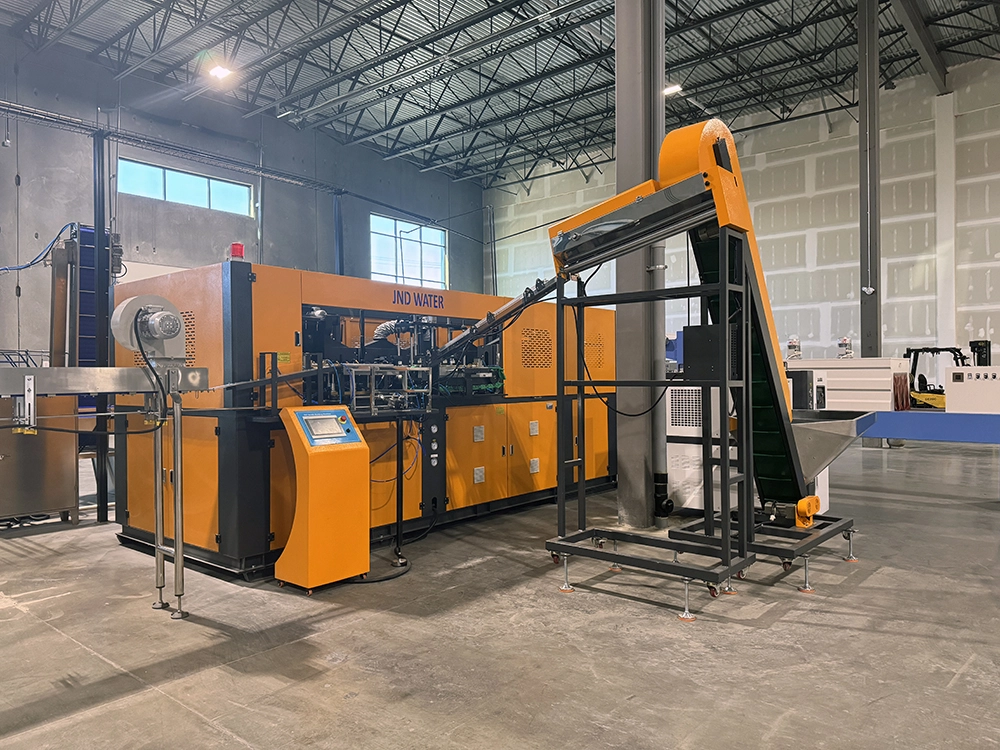
JNDWATER چندین نوع دستگاه قالب گیری دمشی ارائه می دهد که هر کدام تفاوت های جزئی در تغییر قالب دارند:
| ماشین | یادداشت های تغییر قالب |
| نیمه خودکار PET | بارگذاری دستی قالب، حفره تک یا دوگانه، ۳۰ تا ۶۰ دقیقه. ایده آل برای بطری های ۰.۵ تا ۱۰ لیتری. |
| چرخش چرخشی کاملا خودکار | فر گرمایشی یکپارچه و گیره سروو؛ تعویض قالب با صفحات قفل سریع، ۶۰ تا ۱۲۰ دقیقه. |
| دستگاه های ۵ گالنی / ۴ لیتری | قالب های بزرگ تر نیاز به جابجایی جرثقیل دارند؛ دهانه وسیع تر نور روز را بررسی کنید. |
سیستم های تعویض سریع قالب (QMC)
اگر بیش از ۲ تا ۳ بار در هفته قالب ها را عوض کنید، سیستم تعویض قالب سریع خودش هزینه اش را جبران می کند. مکانیزم های قفل سریع بدون ابزار، کوپلینگ های مایع خودآب بندی شونده و تنظیمات سروو، تغییر زمان را از ساعت به کمتر از ۳۰ دقیقه کاهش می دهند. برای خطوط تولید مخلوط بالا که چندین اندازه بطری تولید می کنند، QMC معمولا ده ها ساعت تولید در ماه بازیابی می کند و بازدهی آن در ۶ تا ۱۵ ماه است.
مشکلات رایج پس از تغییر کپک
| مشکل | علت محتمل | اصلاح |
| فلش در خط جدایی | پیچ ها با سفت کمتر از حد لازم بودند؛ نیروی گیره کم است | پیچ های ریتورک؛ افزایش فشار گیره |
| ضخامت ناهموار دیواره | نسبت کشش قطع است؛ دما نامنظم | تنظیم گرمایش انجام دهید؛ میله کششی را بررسی کنید |
| دشواری از قالب گیری | سرمایش ناکافی قالب گیری؛ مشکل پرتاب کننده | زمان خنک سازی را افزایش دهید؛ تأیید پین های پرتاب کننده |
| نشت آب | خط خنک کننده مهر و موم نشده است | سفت کردن اتصالات؛ جایگزینی اورینگ |
ذخیره سازی و نگهداری کپک
- ذخیره سازی: قالب ها را در فضای خشک و کنترل شده دما روی پالت ها نگه دارید؛ هرگز روی بتن.
- پیشگیری از زنگ زدگی: روغن ضد زنگ را بین استفاده ها روی سطوح حفره بمالید.
- تمیز کردن: هر ماه کانال های خنک کننده را شستشو دهید تا از تجمع رسوب جلوگیری شود.
- روانکاری: پین های راهنمای گریس را هر ۳ ماه یا ۵۰۰ چرخه تعویض کنید.
- بازرسی: قبل از هر بار نصب مجدد، خط جداسازی و دریچه ها را بررسی کنید.
پرسش و پاسخهای متداول
تعویض قالب در دستگاه قالب گیری دمشی چقدر طول می کشد؟
برای یک دستگاه نیمه خودکار قالب گیری PET، حدود ۳۰ تا ۶۰ دقیقه زمان می برد. دستگاه های چرخان کاملا خودکار ممکن است ۶۰ تا ۱۲۰ دقیقه زمان ببرند. سیستم QMC این زمان را به ۱۵ تا ۳۰ دقیقه کاهش می دهد.
چه ابزارهایی برای تغییر قالب دستگاه قالب گیری دمنده لازم است؟
ابزارهای ضروری شامل آچار گشتاوری، مجموعه کلید آلن، پیچ گوشتی ها، چکش برنجی، بالابر یا جرثقیل برای قالب های سنگین، پارچه های تمیزکننده، عامل آزادکننده قالب و گریس روان کننده با دمای بالا است.
آیا می توانم خودم قالب را عوض کنم یا به تکنسین نیاز دارم؟
اپراتورهای آموزش دیده می توانند مطابق با دفترچه راهنما، تغییرات قالب استاندارد را انجام دهند. برای تغییرات اولیه، قالب های پیچیده چندحفره ای یا مشکلات کالیبراسیون، باید یک تکنسین دارای گواهی نظارت داشته باشید. JNDWATER آموزش و راه اندازی در محل را برای دستگاه های قالب گیری دمشی خود فراهم می کند.
قالب های قالب گیری بادی هر چند وقت یک بار باید تعویض شوند؟
با نگهداری مناسب، قالب های دمشی PET معمولا ۳ تا ۵ سال دوام می آورند. وقتی فلاش مداوم، ضخامت ناهموار دیواره یا سایش قابل مشاهده حفره را مشاهده کردید، تعویض کنید.
نتیجه گیری
تعویض قالب ها در دستگاه قالب گیری دمشی فرآیندی سیستماتیک است که بر پایه ایمنی، دقت و تکنیک صحیح بنا شده است. فرآیند چهار مرحله ای — آماده سازی، حذف، نصب و آزمایش — را دنبال کنید تا زمان توقف را به حداقل برسانید و کیفیت بطری از همان چرخه اول ثابت باشد.
برای اطلاعات بیشتر دستگاه های قالب گیری دمشی JNDWATER, شرکت ما و گواهینامه ها، یا راهنماهای صنعتی، کتابخانه منابع ما را بررسی کنید.
نیاز به کمک در عملیات قالب گیری دمنده دارید؟
تیم مهندسی JNDWATER دارای ۱۷+ سال تجربه در کمک به تولیدکنندگان سراسر جهان برای بهینه سازی تولید است. چه به یک دستگاه جدید نیاز داشته باشید یا نه دستگاه قالب گیری ضربه ایآموزش تعویض کپک یا راه حل سریع تعویض کپک، ما اینجا هستیم تا به شما کمک کنیم.
۱۷+ سال تجربه در طراحی، تولید و خدمات فنی دستگاه قالب گیری دمنده در ۱۲۵+ کشور. دارای گواهینامه مهندسی پلاستیک و مدیریت ایمنی صنعتی.