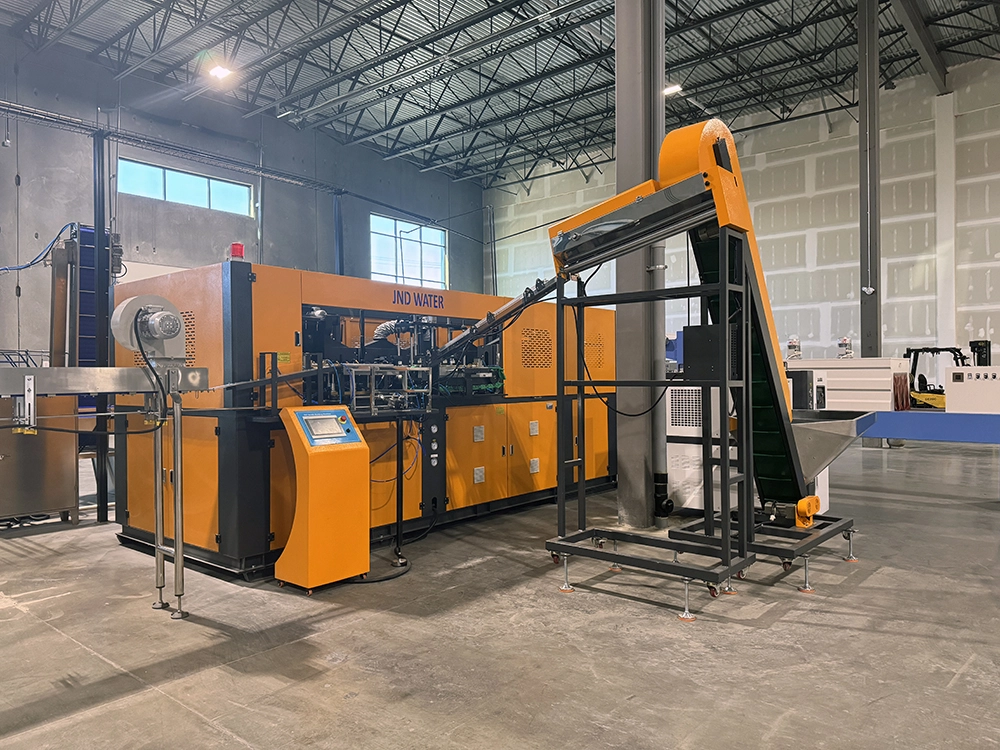
Mengganti cetakan pada mesin cetakan tiup adalah perawatan rutin yang secara langsung memengaruhi waktu produksi dan kualitas botol Anda. Apakah Anda menjalankan blower PET semi-otomatis JNDWATER atau mesin rotary blow molding otomatis penuh, prosedur penggantian cetakan mengikuti prinsip inti yang sama. Panduan ini membimbing Anda melalui seluruh proses — persiapan, penghapusan, instalasi, pengujian, dan pemecahan masalah — berdasarkan pengalaman lapangan selama 17+ tahun memasok 9.000+ lini produksi ke 125+ negara.
Persiapan Keamanan Sebelum Mengganti Cetakan
Persiapan yang tepat tidak bisa ditawar. Melewatkan langkah keselamatan dapat menyebabkan cedera, kerusakan peralatan, dan waktu henti yang mahal.
PERINGATAN: Jangan pernah mencoba mengganti cetakan saat mesin menyala atau sistem hidrolik sedang bertekanan. Selalu ikuti prosedur Lockout/Tagout (LOTO) di fasilitas Anda.
Alat yang Diperlukan
| Kategori | Alat | Tujuan |
| Alat Tangan | Kunci torsi, set kunci Allen, obeng, palu kuningan | Pelonggaran/pengencangan baut, penyesuaian |
| Mengangkat | Gantungan gantung, pengangkat, atau cetakan di atas kepala | Penanganan jamur yang aman |
| Pembersihan | Pelarut, kain bebas serat, udara bertekanan | Pembersihan rongga dan saluran |
| Pelumas | Gemuk suhu tinggi, agen pelepas cetakan, minyak karat | Pelumasan pin panduan, perlindungan |
| APD | Sarung tangan tahan panas, kacamata pelindung, sepatu bot berujung baja | Perlindungan pribadi |
Prosedur Pemadaman Mesin
- Hentikan produksi dan biarkan pita pemanas mendingin di bawah 50°C (122°F).
- mengurangi tekanan sistem hidrolik dan verifikasi pengukur menunjukkan nol.
- Lockout/Tagout — Putuskan daya utama dan kunci Anda.
- Drainase air pendingin dari saluran cetakan sebelum memutus kabel.
Langkah 1 — Hilangkan Jamur Lama
Mulailah dengan memberi label pada setiap sambungan (saluran pendingin, selang udara, kabel pemanas, termokop) dengan pita berwarna atau label bernomor — ini mencegah kebingungan saat pemasangan ulang. Ambil foto sebelum memutuskan sambungan.
Longgarkan Baut dalam Pola Diagonal
Longgarkan baut pemasangan secara bertahap dalam pola diagonal (bintang) — tidak pernah berurutan di sekitar perimeter. Ini mencegah cetakan menempel pada pin panduan. Kendurkan setiap baut satu perempat putaran, lalu lanjutkan ke baut yang berlawanan, hingga semuanya longgar dengan tangan. Simpan baut dalam wadah berlabel.
TIPS PRO: Kesalahan lapangan yang paling umum yang kita lihat adalah melonggarkan baut dalam lingkaran. Ini membuat cetakan bergeser tidak merata dan menjepit pin panduan. Selalu bekerja secara diagonal.
Angkat dan Simpan Cetakan Lama
Cetakan tiup dapat memiliki berat 50 kg hingga lebih dari 1.000 kg. Jangan pernah mengangkat secara manual. Pasang baut mata pengangkat pada titik yang ditentukan, pastikan sudut tali kurang dari 60° dari vertikal, dan angkat 1-2 cm terlebih dahulu untuk memeriksa kekaitan. Ketuk perlahan dengan palu kuningan untuk membuka segel jika diperlukan — jangan pernah menggunakan palu baja. Simpan cetakan di atas palet kayu atau karpet karet, jangan pernah langsung di atas beton.
Langkah 2 — Periksa dan Siapkan Cetakan Baru
Pastikan cetakan baru sesuai dengan mesin Anda sebelum memasang. Ketidaksesuaian merusak cetakan dan mesin.
| Cek | Apa yang Harus Diverifikasi | Risiko jika salah |
| Kekuatan Penjepit | Cetakan membutuhkan kurang dari mesin maksimal | Flash, kelebihan beban |
| Tinggi cetakan | Cocok untuk kompor siang hari mesin | Tidak mau dipasang |
| Pola Pemasangan | Lubang baut cocok dengan platen | Pas yang tidak aman |
| Panjang Goresan | Mengakomodasi pembukaan cetakan | Kegagalan demolding |
| Saluran Pendingin | Diameter cocok dengan fitting | Pendinginan yang buruk |
Bersihkan rongga dan saluran pendingin dengan pelarut dan udara bertekanan. Usap kuku di sepanjang garis pemisah — seharusnya terasa rata sempurna; Setiap goresan bisa menyebabkan kilatan. Oleskan lapisan tipis gemuk molibdenum disulfida (MoS2) pada pin dan bushing panduan. Hindari penggemuruhan berlebihan, karena dapat menarik kotoran.
Langkah 3 — Pasang Cetakan Baru
Sejajarkan cetakan dengan pin panduan dan kencangkan dua baut diagonal dengan tangan, lalu masukkan sisanya. Ini adalah langkah paling krusial — torsi yang tidak tepat menyebabkan masalah kualitas pasca-pergantian.
| Lulus | tingkat torsi | Aksi |
| 1 | 30% dari spesifikasi | Rapat semua baut dalam pola silang |
| 2 | 70% dari spesifikasi | Kencangkan pola yang sama |
| 3 | 100% dari spesifikasi | Torsi akhir dengan kunci kunci tipe klik |
PERHATIAN: Selalu ikuti grafik torsi mesin Anda. Nilai tipikal berkisar antara 80 Nm (M12) hingga 340 Nm (M20). Torsi yang salah dapat menyebabkan kegagalan baut selama produksi.
Sambungkan kembali saluran dengan urutan terbalik saat dilepas (listrik → udara → air), menggunakan label dan foto Anda. Buka pasokan air dan periksa setiap fitting untuk kebocoran. Lepaskan perangkat LOTO dan pulihkan daya.
Langkah 4 — Uji dan Kalibrasi
Jalankan siklus uji tanpa beban pertama, untuk memverifikasi penyelarasan tanpa material. Kemudian produksi 5-10 botol sampel dengan kecepatan rendah dan periksa:
- Flash — kelebihan material di garis pemisah (baut atau masalah tekanan)
- Ketebalan dinding tidak merata — rasio regangan atau masalah suhu
- melengkung — masalah pendinginan atau waktu tiup
Sesuaikan tekanan tiupan, suhu, dan waktu hingga sampel konsisten. Dokumentasikan semua parameter dalam log peralihan untuk mempercepat perubahan berikutnya.
Perubahan Cetakan Berdasarkan Jenis Mesin
JNDWATER menawarkan beberapa jenis mesin blow molding, masing-masing dengan sedikit perbedaan perubahan cetakan:
| Mesin | Catatan Perubahan Cetakan |
| PET semi-otomatis | Pemuatan cetakan manual, rongga tunggal atau ganda, 30-60 menit. Ideal untuk botol 0,5-10L. |
| Rotary otomatis penuh | Oven pemanas terintegrasi dan penjepit servo; Ganti cetakan melalui pelat quick-lock, 60-120 menit. |
| Mesin 5-galon / 4L | Cetakan yang lebih besar memerlukan penanganan derek; Verifikasi bukaan cahaya siang yang lebih lebar. |
Sistem Penggantian Cetakan Cepat (QMC)
Jika Anda mengganti cetakan lebih dari 2-3 kali seminggu, Sistem Penggantian Cetakan Cepat Membayar dirinya sendiri. Mekanisme quick-lock tanpa alat, kopling cairan yang menyegel sendiri, dan penyesuaian servo memangkas pergantian dari jam menjadi kurang dari 30 menit. Untuk lini dengan campuran tinggi yang memproduksi beberapa ukuran botol, QMC biasanya memulihkan puluhan jam produksi per bulan, dengan pengembalian dalam 6-15 bulan.
Masalah Umum Setelah Ganti Cetakan
| Masalah | penyebab yang mungkin | Memperbaiki |
| Kilatan di garis perpisahan | Baut kurang mekancing; gaya penjepit rendah | Baut retorque; menaikkan tekanan penjepit |
| Ketebalan dinding tidak merata | Rasio peregangan dikurangi; melakukan suhu tidak merata | Sesuaikan pemanasan preform; batang peregangan cek |
| Kesulitan dalam proses demolding | Pendinginan cetakan tidak memadai; masalah ejector | Meningkatkan waktu pendinginan; Verifikasi pin ejector |
| Kebocoran air | Saluran pendingin tidak tertutup | Kencangkan kembali fitting; mengganti O-ring |
Penyimpanan dan Pemeliharaan Cetakan
- Penyimpanan: Simpan cetakan di area kering yang dikontrol suhu di atas palet; Tidak pernah di atas beton.
- Pencegahan karat: Oleskan minyak anti karat pada permukaan rongga di antara penggunaan.
- Cleaning: Bilas saluran pendingin setiap bulan untuk mencegah penumpukan kerak.
- Pelumasan: Olesi ulang pin panduan setiap 3 bulan atau 500 siklus.
- Inspeksi: Periksa saluran pemisah dan ventilasi sebelum setiap pemasangan ulang.
Pertanyaan yang Sering Diajukan
Berapa lama waktu yang dibutuhkan untuk mengganti cetakan pada mesin blow molding?
Untuk mesin blow molding PET semi-otomatis, sekitar 30-60 menit. Mesin rotary otomatis penuh dapat memakan waktu 60-120 menit. Sistem QMC mengurangi waktu menjadi 15-30 menit.
Alat apa saja yang dibutuhkan untuk mengganti cetakan mesin blow molding?
Alat penting meliputi kunci torsi, set kunci Allen, obeng, palu kuningan, hoist atau crane untuk cetakan berat, kain pembersih, agen pelepas cetakan, dan pelumas suhu tinggi.
Apakah saya bisa mengganti cetakan sendiri atau saya perlu teknisi?
Operator terlatih dapat melakukan perubahan cetakan standar sesuai dengan manual. Untuk perubahan pertama, cetakan multi-rongga yang kompleks, atau masalah kalibrasi, pastikan teknisi bersertifikat mengawasi. JNDWATER menyediakan pelatihan dan commissioning di lokasi untuk mesin blow molding-nya.
Seberapa sering cetakan blow molding harus diganti?
Dengan perawatan yang tepat, cetakan tiup PET biasanya bertahan 3-5 tahun. Ganti saat Anda melihat kilatan yang persisten, ketebalan dinding yang tidak merata, atau keausan pada rongga yang terlihat.
Kesimpulan
Mengganti cetakan pada mesin blow molding adalah proses sistematis yang dibangun berdasarkan keamanan, presisi, dan teknik yang tepat. Ikuti prosedur empat langkah — persiapan, penghapusan, pemasangan, dan pengujian — untuk meminimalkan waktu henti dan memastikan kualitas botol yang konsisten sejak siklus pertama.
Untuk informasi lebih lanjut Mesin cetak tiup JNDWATER, Perusahaan dan sertifikasi kami, atau panduan industri, jelajahi perpustakaan sumber daya kami.
Butuh Bantuan untuk Operasi Blow Molding Anda?
Tim teknik JNDWATER memiliki pengalaman 17+ tahun membantu produsen di seluruh dunia mengoptimalkan produksi. Apakah Anda membutuhkan yang baru Mesin Cetak Blow, pelatihan penggantian cetakan, atau solusi cepat untuk mengganti cetakan, kami siap membantu.
17+ tahun pengalaman dalam desain, manufaktur, dan layanan teknis mesin blow molding di 125+ negara. Bersertifikat dalam rekayasa plastik dan manajemen keselamatan industri.