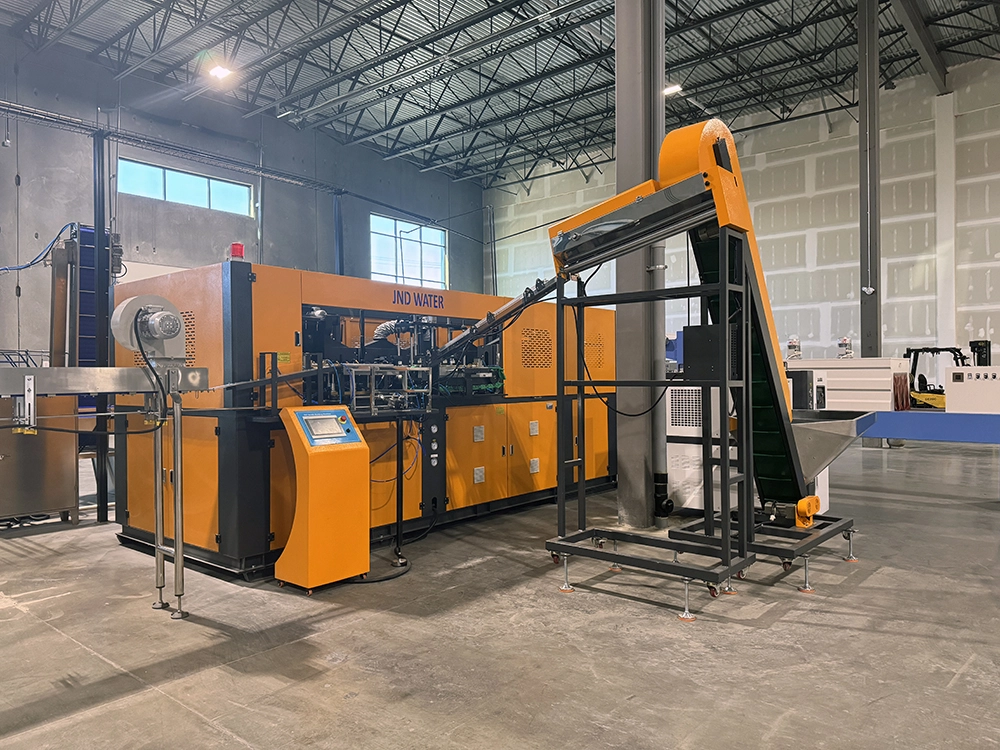
تغيير القوالب على تشكيل النفخ ما تشيني هي الصيانة الدورية التي تؤثر مباشرة على وقت إنتاج الزجاجة وجودة الزجاجة. سواء كنت تستخدم منفاخ PET شبه أوتوماتيكي من JNDWATER أو آلة تشكيل دوار أوتوماتيكية بالكامل، فإن عملية تغيير القالب تتبع نفس المبادئ الأساسية. يرشدك هذا الدليل خلال العملية الكاملة — التحضير، والإزالة والتركيب والاختبار، وحل المشكلات — بناء على 17+ سنة من الخبرة الميدانية في توفير 9,000+ خط إنتاج ل 125+ دولة.
التحضير للسلامة قبل تغيير العفن
التحضير المناسب غير قابل للتفاوض. تجاوز خطوات السلامة يمكن أن يسبب إصابات وتلف المعدات وفترات توقف مكلفة.
تحذير: لا تحاول أبدا تغيير القالب أثناء تشغيل الجهاز أو أثناء ضغط النظام الهيدروليكي. اتبع دائما إجراءات الإغلاق/الخروج (LOTO) الخاصة بمنشأتك.
الأدوات المطلوبة
| الفئة | الأدوات | الغرض |
| الأدوات اليدوية | مفتاح عزم الدوران، مجموعة مفاتيح ألين، مفكات براغي، مطرقة نحاسية | فك وشد البراغي وتعديلات |
| الرفع | رافعة علوية، رافعة أو تركيبة قالب | التعامل الآمن مع العفن |
| التنظيف | أقمشة مذيبة، خالية من الوبر، هواء مضغوط | تنظيف التجويف والقنوات |
| الزيوت | شحم عالي الحرارة، عامل إطلاق العفن، زيت الصدأ | تزييت دبوس التوجيه، الحماية |
| معدات الحماية الشخصية | قفازات مقاومة للحرارة، نظارات واقية، أحذية فولاذية الأصابع | الحماية الشخصية |
إجراء إيقاف تشغيل الآلة
- إيقاف الإنتاج وتسمح لأحزمة السخان بالتبريد تحت 50°C (122°F).
- إزالة الضغط النظام الهيدروليكي وتحقق من أن المقياس يقرأ الصفر.
- الإغلاق/الوسوم — افصل الطاقة الرئيسية وقم بتثبيت القفل.
- مياه تبريد التصريف من قنوات القالب قبل فصل الخطوط.
الخطوة 1 — إزالة العفن القديم
ابدأ بوضع علامات على كل اتصال (خطوط التبريد، خراطيم الهواء، أسلاك التدفئة، الزوجات الحرارية) بشريط ملون أو علامات مرقمة — هذا يمنع حدوث التباس أثناء إعادة التركيب. التقط صورة قبل الانفصال.
فك البراغي بنمط مائل
قم بفك براغي التثبيت تدريجيا في نمط النجمة القطرية — لم يكن أبدا بترتيب حول المحيط. هذا يمنع القالب من الالتصاق بدبابيس التوجيه. قم بفك كل مسمار ربع دورة، ثم ابدأ إلى المسار المقابل، حتى تصبح كلها مرتخية باليد. خزن البراغي في حاوية معنونة.
نصيحة محترفة: أكثر خطأ ميداني شائع نراه هو فك البراغي في دائرة. هذا يغير القالب بشكل غير متساو ويضغط على دبابيس الدليل. دائما اعمل بشكل مائل.
رفع وتخزين العفن القديم
يمكن أن تزن قوالب النفخ من 50 كجم إلى أكثر من 1000 كجم. لا ترفع يدويا أبدا. ثبت براغي العين الرافعة على نقاط محددة، وتأكد من أن زاوية الحمالة أقل من 60° من الوضع الرأسي، وارفع 1-2 سم أولا للتحقق من وجود ربط. انقر بلطف بمطرقة نحاسية لكسر الختم إذا لزم الأمر — لا تستخدم مطرقة فولاذية أبدا. خزن القالب على منصة خشبية أو حصيرة مطاطية، وليس مباشرة على الخرسانة.
الخطوة 2 — فحص وتحضير القالب الجديد
تحقق من أن القالب الجديد يطابق جهازك قبل التركيب. عدم التطابق يتلف كل من العفن والآلة.
| تم التحقق | ما الذي يجب التحقق منه | مخاطرة إذا كنت خاطئا |
| قوة التثبيت | العفن يحتاج أقل من الحد الأقصى للآلة | فلاش، تحميل زائد |
| ارتفاع العفن | يتناسب مع جهاز النهار | لا يتم تركيبه |
| نمط التثبيت | ثقوب البراغي تتطابق مع الألواح | التوافق غير الآمن |
| طول الضربة | يستوعب فتحة العفن | فشل إزالة القوالب |
| قنوات التبريد | القطر يتطابق مع الوصلات | تبريد ضعيف |
نظف التجويف وقنوات التبريد بالمذيب والهواء المضغوط. مرر ظفرك على خط الفراق — يجب أن يشعر بأنه مسطح تماما؛ أي خدش يسبب فلاش. ضع طبقة رقيقة من شحم ثنائي الكبريتيد الموليبدينوم (MoS2) على الدبابيس والبوشات التوجيهية. تجنب التزييت الزائد الذي يجذب الأوساخ.
الخطوة 3 — تركيب القالب الجديد
محاذاة القالب مع دبابيس التوجيه وشد مسمارين مائلين يدويا، ثم أدخل الباقي. هذه هي الخطوة الأكثر أهمية — فالعزم غير المناسب يسبب مشاكل جودة بعد التبديل.
| تجاوز | مستوى العزم | الحدث |
| 1 | 30٪ من المواصفات | ثبت جميع البراغي بنمط متقاطع |
| 2 | 70٪ من المواصفات | شد نفس النمط |
| 3 | 100٪ من المواصفات | عزم الدوران النهائي مع مفتاح النقر |
تحذير: اتبع دائما مخطط عزم الدوران الخاص بجهازك. تتراوح القيم النموذجية من 80 نانومتر (M12) إلى 340 نيوتن متر (M20). العزم الخاطئ يمكن أن يسبب فشل البراغي أثناء الإنتاج.
أعد توصيل الخطوط بترتيب عكسي للإزالة (كهربائي → هواء → ماء)، باستخدام الملصقات وصورتك. افتح مصدر المياه وافحص كل تركيبة بحثا عن تسريبات. قم بإزالة أجهزة LOTO واستعادة الطاقة.
الخطوة 4 — الاختبار والمعايرة
شغل دورة اختبار بدون تحميل أولا للتحقق من المحاذاة بدون وجود مادة. ثم ينتج 5-10 زجاجات عينات بسرعة منخفضة ويفحص إلى:
- فلاش — المادة الزائدة عند خط الانفصال (مشكلة البراغي أو الضغط)
- سمك الجدران غير المتساوي — نسبة التمدد أو مشكلة في درجة الحرارة
- الالتواء — مشكلة في توقيت التبريد أو النفخ
قم بضبط ضغط النفخ، ودرجة الحرارة، والتوقيت حتى تصبح العينات متسقة. وثق جميع المعلمات في سجل التغيير لتسريع التغيير التالي.
تغيير القالب حسب نوع الآلة
تقدم JNDWATER عدة أنواع من آلات النفخ اليدوية، كل منها يحتوي على اختلافات طفيفة في تغيير القوالب:
| آلة | ملاحظات تغيير العفن |
| PET شبه أوتوماتيكي | تحميل يدوي من القالب، تجويف واحد أو مزدوج، من 30 إلى 60 دقيقة. مثالي لزجاجات 0.5-10 لتر. |
| دوار أوتوماتيكي بالكامل | فرن تدفئة مدمجة وتثبيت سيرفو؛ تغيير القالب عبر أقراص القفل السريع، 60-120 دقيقة. |
| ماكينات سعة 5 جالون / 4 لتر | القوالب الأكبر تتطلب التعامل مع الرافعة؛ تحقق من فتحة النهار الواسعة. |
أنظمة تغيير القالب السريع (QMC)
إذا غيرت القوالب أكثر من مرتين إلى ثلاث مرات في الأسبوع، نظام تغيير القالب السريع يدفع ثمن نفسه. آليات القفل السريع بدون أدوات، ووصلات السوائل ذاتية الإغلاق، وتعديلات السيرفو تقلل من التغيير من ساعات إلى أقل من 30 دقيقة. بالنسبة لخطوط الخليط العالي التي تنتج عدة أحجام زجاجات، عادة ما تستعيد QMC عشرات ساعات الإنتاج شهريا، مع عائد في 6-15 شهرا.
المشاكل الشائعة بعد تغيير العفن
| المشكلة | السبب المحتمل | الإصلاح |
| وميض عند خط الوداع | البراغي أقل من الشد؛ قوة المشبك منخفضة | مسامير إعادة العزم؛ رفع ضغط المشبك |
| سمك الجدران غير المتساوي | نسبة التمدد غير فعالة؛ الأداء درجة الحرارة غير متساوية | ضبط التسخين؛ تحقق من قضيب التمدد |
| صعوبة إزالة القوالب | تبريد العفن غير كاف؛ مشكلة القذف | زيادة وقت التبريد؛ تحقق من دبابيس القذف |
| تسرب المياه | خط التبريد غير مغلق | إعادة شد التركيبات؛ استبدال حلقة O |
تخزين وصيانة العفن
- التخزين: احتفظ بالقوالب في منطقة جافة ومضبوطة حرارتها على منصات التدليل؛ أبدا على الخرسانة.
- الوقاية من الصدأ: ضع زيت الوقاية من الصدأ على أسطح التجويف بين الاستخدامات.
- تنظيف: قم بغسل قنوات التبريد شهريا لمنع تراكم القياب.
- التزييت: دبابيس التوجيه لإعادة الشحم كل 3 أشهر أو 500 دورة.
- الفحص: تحقق من خط الفصل والفتحات قبل كل إعادة تركيب.
الأسئلة المتكررة
كم يستغرق تغيير قالب في آلة تشكيل النفخ؟
بالنسبة لآلة تشكيل النفخ شبه الأوتوماتيكية PET، يستغرق الأمر حوالي 30-60 دقيقة. قد تستغرق الآلات الدوارة الأوتوماتيكية بالكامل من 60 إلى 120 دقيقة. نظام QMC يقلل هذا إلى 15-30 دقيقة.
ما هي الأدوات اللازمة لتغيير قالب آلة النفخ؟
تشمل الأدوات الأساسية مفتاح عزم الدوران، مجموعة مفاتيح ألين، مفكات براغي، مطرقة نحاسية، رافعة أو رافعة للقوالب الثقيلة، أقمشة تنظيف، عامل تحرير العفن، وشحم تشحيم عالي الحرارة.
هل يمكنني تغيير القالب بنفسي أم أحتاج إلى فني؟
يمكن للمشغلين المدربين إجراء تغييرات القالب القياسية وفقا للدليل. بالنسبة للتغييرات الأولى، أو القوالب المعقدة متعددة التجاويف، أو مشاكل المعايرة، يجب إشراف فني معتمد. توفر JNDWATER تدريبا ميدانيا وتكليفا لآلات تشكيل النفخ الخاصة بها.
كم مرة يجب استبدال قوالب النفخ المصنوعة من النفخ؟
مع الصيانة المناسبة، تدوم قوالب النفخ PET عادة من 3 إلى 5 سنوات. استبدل عندما ترى وميضا مستمرا، أو سمك غير متساوي للجدران، أو تآكل واضح للتسوس.
الخاتمة
تغيير القوالب في آلة النفخ هو عملية منهجية مبنية على السلامة والدقة والتقنية الصحيحة. اتبع الإجراءات الأربع خطوات — التحضير، الإزالة، التركيب، والاختبار — لتقليل وقت التوقف وضمان جودة الزجاجة المتسقة منذ الدورة الأولى.
لمزيد من المعلومات آلات تشكيل النفخ من JNDWATER, شركتنا والشهادات، أو أدلة الصناعة، استكشف مكتبة الموارد الخاصة بنا.
هل تحتاج مساعدة في عملية تشكيل النفخ الخاصة بك؟
فريق الهندسة في JNDWATER لديه خبرة تمتد ل 17+ سنة في مساعدة المصنعين حول العالم على تحسين الإنتاج. سواء كنت بحاجة إلى جديد آلة نفخ النفخأو تدريب على تغيير العفن، أو حل سريع لتغيير العفن، نحن هنا لمساعدتك.
خبرة 17+ سنة في تصميم وتصنيع وصيانة آلات النفخ عبر 125+ دولة. معتمد في هندسة البلاستيك وإدارة السلامة الصناعية.