How to Change Mold on a Blow Molding Machine: Step-by-Step Guide JND WATER

JND Water是矿泉水机、碳酸饮料生产线、空气输送系统和果汁饮料生产线的专家生产商。我们公司刚刚推出了一系列尖端机械,包括节能和环保的电动设备。每年,市场上都会推出数十种新商品。

新闻

How to Change Mold on a Blow Molding Machine: Step-by-Step Guide

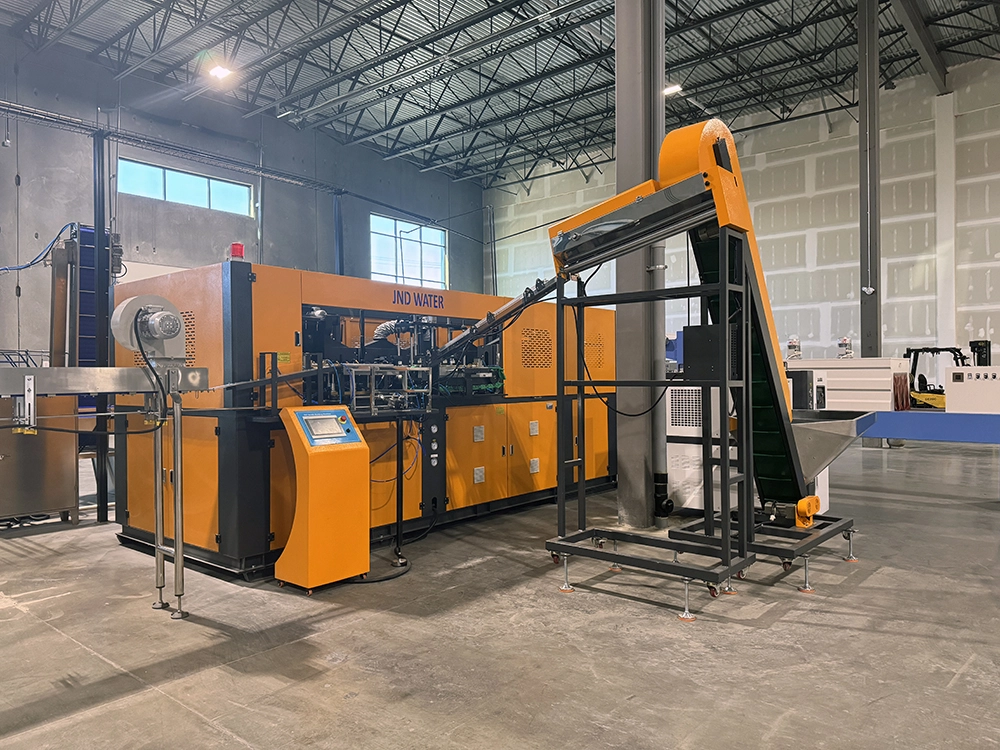
Changing molds on a blow molding ma chine is routine maintenance that directly affects your production uptime and bottle quality. Whether you run a JNDWATER semi-automatic PET blower or a fully automatic rotary blow molding machine, the mold change procedure follows the same core principles. This guide walks you through the complete process — preparation, removal, installation, testing, and troubleshooting — based on 17+ years of field experience supplying 9,000+ production lines to 125+ countries.

Safety Preparation Before Mold Change

Proper preparation is non-negotiable. Skipping safety steps can cause injury, equipment damage, and costly downtime.

WARNING: Never attempt a mold change while the machine is powered on or the hydraulic system is pressurized. Always follow your facility’s Lockout/Tagout (LOTO) procedure.

Required Tools

Category Tools Purpose
Hand Tools Torque wrench, Allen key set, screwdrivers, brass hammer Bolt loosening/tightening, adjustments
Lifting Overhead crane, hoist, or mold fixture Safe mold handling
清洁 Solvent, lint-free cloths, compressed air Cavity and channel cleaning
Lubricants High-temp grease, mold release agent, rust oil Guide pin lubrication, protection
PPE Heat-resistant gloves, goggles, steel-toed boots Personal protection

Machine Shutdown Procedure

  1. Stop production and allow heater bands to cool below 50°C (122°F).
  2. Depressurize the hydraulic system and verify the gauge reads zero.
  3. Lockout/Tagout — disconnect main power and apply your lock.
  4. Drain cooling water from mold channels before disconnecting lines.

Step 1 — Remove the Old Mold

Start by labeling every connection (cooling lines, air hoses, heater wiring, thermocouples) with colored tape or numbered tags — this prevents confusion during reinstallation. Take a photo before disconnecting.

Loosen Bolts in a Diagonal Pattern

Loosen mounting bolts gradually in a diagonal (star) pattern — never in sequence around the perimeter. This prevents the mold from binding on the guide pins. Loosen each bolt one quarter-turn, working to the opposite bolt next, until all are hand-loose. Store bolts in a labeled container.

PRO TIP: The most common field mistake we see is loosening bolts in a circle. This shifts the mold unevenly and pinches the guide pins. Always work diagonally.

Lift and Store the Old Mold

Blow molds can weigh 50 kg to over 1,000 kg. Never lift manually. Attach lifting eye bolts to designated points, verify the sling angle is under 60° from vertical, and lift 1-2 cm first to check for binding. Tap gently with a brass hammer to break the seal if needed — never a steel hammer. Store the mold on a wooden pallet or rubber mat, never directly on concrete.

Step 2 — Inspect and Prepare the New Mold

Verify the new mold matches your machine before installing. Mismatches damage both mold and machine.

Check What to Verify Risk if Wrong
夹紧力 Mold needs less than machine max Flash, overload
Mold Height Fits machine daylight range Won’t mount
Mounting Pattern Bolt holes match platen Insecure fit
Stroke Length Accommodates mold opening Demolding failure
Cooling Channels Diameter matches fittings Poor cooling

Clean the cavity and cooling channels with solvent and compressed air. Run a fingernail along the parting line — it should feel perfectly flat; any nick causes flash. Apply a thin coat of molybdenum disulfide (MoS2) grease to guide pins and bushings. Avoid over-greasing, which attracts dirt.

Step 3 — Install the New Mold

Align the mold with the guide pins and hand-tighten two diagonal bolts, then insert the rest. This is the most critical step — improper torque causes post-changeover quality issues.

Pass Torque Level Action
1 30% of spec Snug all bolts in crisscross pattern
2 70% of spec Tighten same pattern
3 100% of spec Final torque with click-type wrench

CAUTION: Always follow your machine’s torque chart. Typical values range from 80 Nm (M12) to 340 Nm (M20). Wrong torque can cause bolt failure during production.

Reconnect lines in reverse order of removal (electrical → air → water), using your labels and photo. Open the water supply and check every fitting for leaks. Remove LOTO devices and restore power.

Step 4 — Test and Calibrate

Run a no-load test cycle first to verify alignment without material. Then produce 5-10 sample bottles at reduced speed and inspect for:

  • Flash — excess material at parting line (bolts or pressure issue)
  • Uneven wall thickness — stretch ratio or temperature issue
  • Warping — cooling or blow timing issue

Adjust blow pressure, temperature, and timing until samples are consistent. Document all parameters in a changeover log to speed up the next change.

Mold Change by Machine Type

JNDWATER offers several blow molding machine types, each with slight mold-change differences:

Machine Mold Change Notes
Semi-auto PET Manual mold loading, single or double cavity, 30-60 min. Ideal for 0.5-10L bottles.
Fully automatic rotary Integrated heating oven and servo clamping; mold change via quick-lock platens, 60-120 min.
5-gallon / 4L machines Larger molds require crane handling; verify the wider daylight opening.

Quick Mold Change (QMC) Systems

If you change molds more than 2-3 times per week, a Quick Mold Change system pays for itself. Toolless quick-lock mechanisms, self-sealing fluid couplings, and servo adjustments cut changeover from hours to under 30 minutes. For high-mix lines producing multiple bottle sizes, QMC typically recovers dozens of production hours per month, with payback in 6-15 months.

Common Problems After Mold Change

问题 Likely Cause Fix
Flash at parting line Bolts undertorqued; clamp force low Retorque bolts; raise clamp pressure
Uneven wall thickness Stretch ratio off; preform temp uneven Adjust preform heating; check stretch rod
Difficulty demolding Insufficient mold cooling; ejector issue Increase cooling time; verify ejector pins
漏水 Cooling line not sealed Retighten fittings; replace O-ring

Mold Storage and Maintenance

  • 存储: Keep molds in a dry, temperature-controlled area on pallets; never on concrete.
  • Rust prevention: Apply rust preventive oil to cavity surfaces between uses.
  • 清洗: Flush cooling channels monthly to prevent scale buildup.
  • 润滑: Re-grease guide pins every 3 months or 500 cycles.
  • 检查: Check parting line and vents before each reinstallation.

常见问题解答

How long does it take to change a mold on a blow molding machine?

For a semi-automatic PET blow molding machine, about 30-60 minutes. Fully automatic rotary machines may take 60-120 minutes. A QMC system reduces this to 15-30 minutes.

What tools are needed to change a blow molding machine mold?

Essential tools include a torque wrench, Allen key set, screwdrivers, a brass hammer, a hoist or crane for heavy molds, cleaning cloths, mold release agent, and high-temperature lubricating grease.

Can I change the mold myself or do I need a technician?

Trained operators can perform standard mold changes following the manual. For first-time changes, complex multi-cavity molds, or calibration issues, have a certified technician supervise. JNDWATER provides on-site training and commissioning for its blow molding machines.

How often should blow molding molds be replaced?

With proper maintenance, PET blow molds typically last 3-5 years. Replace when you see persistent flash, uneven wall thickness, or visible cavity wear.

结论

Changing molds on a blow molding machine is a systematic process built on safety, precision, and proper technique. Follow the four-step procedure — preparation, removal, installation, and testing — to minimize downtime and ensure consistent bottle quality from the first cycle.

For more on JNDWATER blow molding machines, our company and certifications, or industry guides, explore our resource library.

Need Help with Your Blow Molding Operation?

JNDWATER’s engineering team has 17+ years of experience helping manufacturers worldwide optimize production. Whether you need a new 吹塑机, mold change training, or a quick mold change solution, we’re here to help.

17+ years of experience in blow molding machine design, manufacturing, and technical service across 125+ countries. Certified in plastics engineering and industrial safety management.

你一直渴望问的装瓶秘密

从第一滴过滤到数百万瓶子从您的产品线中流出,我们为您解开了所需的行业洞察。无论是技术规格还是运营效率,这里都能找到明确的答案。

使用本文

相关文章

filling machine water
新闻

Jndwater成功为香港客户安装紧凑型小瓶装管线,灵活布局克服空间限制

深圳市金富来饮水设备有限公司, a leading manufacturer of beverage filling and packaging machinery, has successfully completed the installation, commissioning, and training for a 2,000–3,000 BPH small bottle filling line for a Hong Kong-based beverage producer. The line has now officially entered production. The project highlights JNDWATER’s capability to deliver customized small…

阅读更多
film wrapping machine
新闻

软饮料加水管线常见故障及快速故障排除指南

灌装线由多种设备组成,包括灌装机、吹塑机、标签机和包装机。这些机器的任何一台故障都可能影响整条线路的运行。以下是最常见的设备故障和快速排查方法。一、填充机填充量不准确:主要......

阅读更多
opp labeling machine
新闻

碳酸饮料生产线使用哪种类型的标签机?分析OPP热熔胶标签机的优势。

碳酸饮料生产有特定的环境要求——装满后瓶子温度较低(通常低于4°C),运输过程中容易冷凝;生产线速度很快;碳酸饮料瓶需要承受4-5大气压的内部压力,使瓶子相对坚固。这些特性决定了标签设备的选择。OPP......

阅读更多
auto blow molding machine
新闻

PET吹塑机能生产哪些类型的瓶子?

PET吹塑机是包装行业中最广泛使用的设备之一。从日常矿泉水瓶到高端化妆品瓶,从碳酸饮料瓶到食用油瓶,PET吹塑机几乎覆盖了你能想象到的所有空心塑料容器。那么,Jndwater PET可以吹哪些瓶子类型......

阅读更多