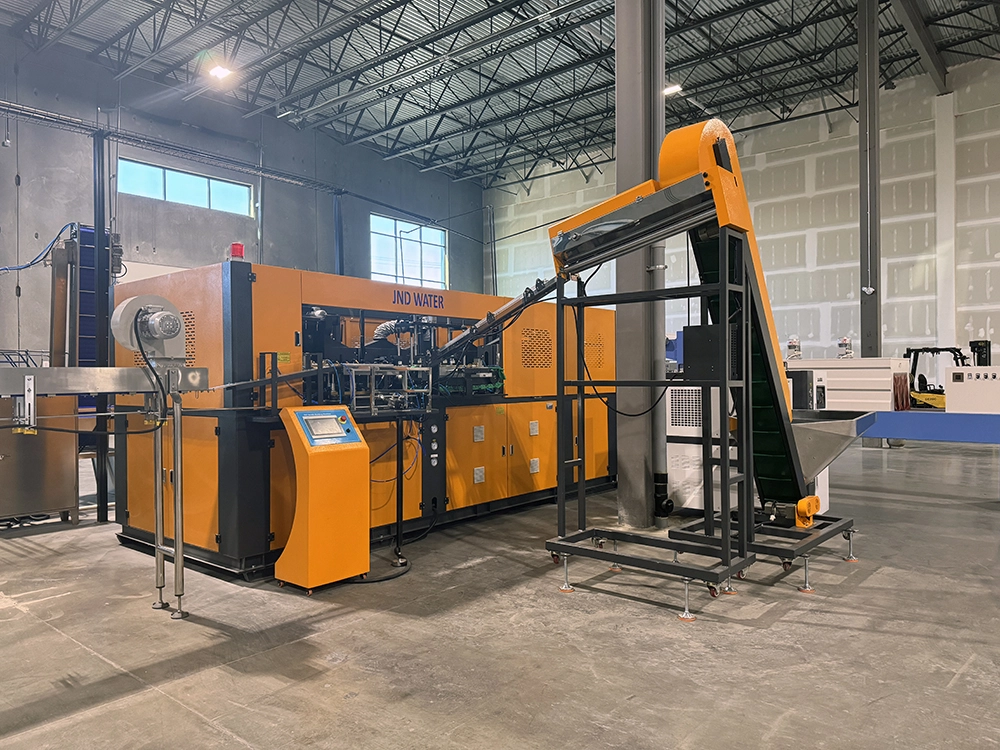
Menukar acuan pada mesin acuan tiup adalah penyelenggaraan rutin yang secara langsung mempengaruhi masa operasi pengeluaran dan kualiti botol anda. Sama ada anda menggunakan blower PET separa automatik JNDWATER atau mesin acuan tiup berputar automatik sepenuhnya, prosedur penukaran acuan mengikuti prinsip teras yang sama. Panduan ini membimbing anda melalui keseluruhan proses — penyediaan, penyingkiran, pemasangan, ujian, dan penyelesaian masalah — berdasarkan 17+ tahun pengalaman lapangan membekalkan 9,000+ barisan pengeluaran ke 125+ negara.
Persediaan Keselamatan Sebelum Penukaran Acuan
Persediaan yang betul tidak boleh dirunding. Melangkau langkah keselamatan boleh menyebabkan kecederaan, kerosakan peralatan, dan masa henti yang mahal.
AMARAN: Jangan sekali-kali cuba menukar acuan semasa mesin dihidupkan atau sistem hidraulik bertekanan. Sentiasa ikut prosedur Lockout/Tagout (LOTO) di fasiliti anda.
Alat Diperlukan
| Kategori | Alat | Tujuan |
| Alat Tangan | Sepana tork, set kunci Allen, pemutar skru, tukul tembaga | Pelonggaran/ketatkan bolt, pelarasan |
| Mengangkat | Alat kren atas, pengangkat, atau acuan | Pengendalian kulat yang selamat |
| Pembersihan | Pelarut, kain bebas serat, udara termampat | Pembersihan rongga dan saluran |
| Pelincir | Gris suhu tinggi, agen pelepas acuan, minyak karat | Pelinciran pin panduan, perlindungan |
| PPE | Sarung tangan tahan haba, cermin mata pelindung, but berkaki keluli | Perlindungan peribadi |
Prosedur Penutupan Mesin
- Hentikan pengeluaran dan membenarkan jalur pemanas sejuk di bawah 50°C (122°F).
- mengurangkan tekanan sistem hidraulik dan sahkan tolok menunjukkan sifar.
- Lockout/Tagout — Putuskan kuasa utama dan gunakan kunci anda.
- Saliran air penyejuk dari saluran acuan sebelum memutuskan talian.
Langkah 1 — Buang kulat lama
Mulakan dengan melabelkan setiap sambungan (saluran penyejukan, hos udara, pendawaian pemanas, termokopeling) menggunakan pita berwarna atau tag bernombor — ini mengelakkan kekeliruan semasa pemasangan semula. Ambil gambar sebelum memutuskan sambungan.
Longgarkan Bolt dalam Corak Perong
Longgarkan bolt pemasangan secara beransur-ansur dalam corak diagonal (bintang) — tidak pernah secara berurutan di sekitar perimeter. Ini menghalang acuan daripada melekat pada pin panduan. Longgarkan setiap bolt satu suku pusingan, kemudian sambung ke bolt bertentangan seterusnya, sehingga semuanya longgar dengan tangan. Simpan bolt dalam bekas berlabel.
TIP PRO: Kesilapan lapangan yang paling biasa kita lihat ialah melonggarkan bolt dalam bulatan. Ini mengalihkan acuan secara tidak sekata dan mencubit pin panduan. Sentiasa bekerja secara menyerong (diagonal).
Angkat dan Simpan Acuan Lama
Acuan tiup boleh seberat 50 kg hingga lebih 1,000 kg. Jangan angkat secara manual. Pasang bolt mata pengangkat pada titik yang ditetapkan, pastikan sudut tali kurang daripada 60° dari menegak, dan angkat 1-2 cm terlebih dahulu untuk memeriksa ikatan. Ketuk perlahan dengan tukul tembaga untuk memecahkan kedap jika perlu — jangan sekali-kali tukul keluli. Simpan acuan di atas palet kayu atau tikar getah, jangan sesekali terus di atas konkrit.
Langkah 2 — Periksa dan Sediakan Acuan Baru
Sahkan acuan baru sepadan dengan mesin anda sebelum memasang. Ketidakpadanan merosakkan acuan dan mesin.
| Semak | Apa yang Perlu Disahkan | Risiko jika salah |
| Daya Pengapit | Acuan memerlukan kurang daripada maksimum mesin | Flash, beban berlebihan |
| Ketinggian acuan | Sesuai dengan dapur siang mesin | Tak boleh dipasang |
| Corak Pemasangan | Lubang bolt sepadan platen | Padanan yang tidak selamat |
| Panjang Goresan | Menampung pembukaan acuan | Kegagalan membuka acuan |
| Saluran Penyejukan | Diameter padanan kelengkapan | Penyejukan yang lemah |
Bersihkan rongga dan saluran penyejukan dengan pelarut dan udara termampat. Jalankan kuku di sepanjang garis pemisah — ia sepatutnya terasa rata sempurna; sebarang calar menyebabkan kilauan. Sapukan lapisan nipis gris molibdenum disulfida (MoS2) pada pin panduan dan bushing. Elakkan melangis berlebihan, kerana ia menarik kotoran.
Langkah 3 — Pasang Acuan Baru
Selaraskan acuan dengan pin panduan dan ketatkan dua bolt menyerong secara manual, kemudian masukkan baki bolt. Ini adalah langkah paling kritikal — tork yang tidak betul menyebabkan masalah kualiti selepas penukaran.
| Lulus | tahap tork | Tindakan |
| 1 | 30% daripada spesifikasi | Ketatkan semua bolt dalam corak silang |
| 2 | 70% daripada spesifikasi | Ketatkan corak yang sama |
| 3 | 100% spesifikasi | Tork akhir dengan kunci kunci jenis klik |
AMARAN: Sentiasa ikut carta tork mesin anda. Nilai tipikal adalah antara 80 Nm (M12) hingga 340 Nm (M20). Tork yang salah boleh menyebabkan kegagalan bolt semasa pengeluaran.
Sambungkan semula talian mengikut urutan terbalik (elektrik → udara → air), menggunakan label dan gambar anda. Buka bekalan air dan periksa setiap sambungan untuk kebocoran. Buang peranti LOTO dan pulihkan kuasa.
Langkah 4 — Uji dan Kalibrasi
Jalankan kitaran ujian tanpa beban pertama untuk mengesahkan penjajaran tanpa bahan. Kemudian hasilkan 5-10 botol sampel pada kelajuan yang dikurangkan dan periksa untuk:
- Flash — bahan berlebihan di garisan pemisah (bolt atau isu tekanan)
- Ketebalan dinding tidak sekata — nisbah regangan atau isu suhu
- melengkung — isu penyejukan atau masa tiupan
Laraskan tekanan tiupan, suhu, dan masa sehingga sampel konsisten. Dokumentasikan semua parameter dalam log pertukaran untuk mempercepatkan perubahan seterusnya.
Penukaran acuan mengikut jenis mesin
JNDWATER menawarkan beberapa jenis mesin acuan tiupan, setiap satu dengan sedikit perbezaan dalam penukaran acuan:
| Mesin | Nota Perubahan Acuan |
| Separa automatik PET | Pemuatan acuan manual, rongga tunggal atau berganda, 30-60 minit. Sesuai untuk botol 0.5-10L. |
| Putar automatik sepenuhnya | Ketuhar pemanas dan pengapit servo bersepadu; Penukaran acuan melalui plat quick-lock, 60-120 minit. |
| Mesin 5-gelen / 4L | Acuan yang lebih besar memerlukan pengendalian kren; Sahkan bukaan cahaya siang yang lebih lebar. |
Sistem Penukaran Acuan Pantas (QMC)
Jika anda menukar acuan lebih daripada 2-3 kali seminggu, Sistem Penukaran Acuan Pantas membayar sendiri. Mekanisme kunci pantas tanpa alat, sambungan cecair yang menutup sendiri, dan pelarasan servo memendekkan pertukaran dari jam ke bawah 30 minit. Untuk barisan campuran tinggi yang menghasilkan pelbagai saiz botol, QMC biasanya memulihkan puluhan jam pengeluaran setiap bulan, dengan pulangan dalam 6-15 bulan.
Masalah Biasa Selepas Penukaran Acuan
| Masalah | punca yang mungkin | Baiki |
| Kilat di tali perpisahan | Bolt kurang ditorsen; daya pengapit rendah | Bolt retorque; menaikkan tekanan pengapit |
| Ketebalan dinding tidak sekata | Kurangkan nisbah regangan; tidak sekata suhu | Laraskan pemanasan pra-forma; rod regangan cek |
| Kesukaran untuk membuka bentuk | Penyejukan acuan tidak mencukupi; isu pengusir | Meningkatkan masa penyejukan; Sahkan pin ejector |
| Kebocoran air | Saluran penyejukan tidak disegel | Ketatkan semula kelengkapan; menggantikan O-ring |
Penyimpanan dan Penyelenggaraan Acuan
- Penyimpanan: Simpan acuan di kawasan kering yang dikawal suhu di atas palet; Tidak pernah di atas konkrit.
- Pencegahan karat: Sapukan minyak pencegahan karat pada permukaan rongga antara penggunaan.
- Pembersihan: Bilas saluran penyejukan setiap bulan untuk mengelakkan pembentukan kerak.
- Pelinciran: Oleskan semula pin panduan setiap 3 bulan atau 500 kitaran.
- Pemeriksaan: Periksa tali pemisah dan ventilasi sebelum setiap pemasangan semula.
Soalan Lazim
Berapa lama masa yang diambil untuk menukar acuan pada mesin blow molding?
Untuk mesin acuan tiup PET separa automatik, kira-kira 30-60 minit. Mesin putar automatik sepenuhnya mungkin mengambil masa 60-120 minit. Sistem QMC mengurangkan masa ini kepada 15-30 minit.
Apakah alat yang diperlukan untuk menukar acuan mesin acuan blow molding?
Alat penting termasuk kunci tork, set kunci Allen, pemutar skru, tukul tembaga, pengangkat atau kren untuk acuan berat, kain pembersih, agen pelepas acuan, dan gris pelincir suhu tinggi.
Bolehkah saya tukar acuan sendiri atau perlukan juruteknik?
Pengendali terlatih boleh melakukan penukaran acuan standard mengikut manual. Untuk penukaran kali pertama, acuan berbilang rongga yang kompleks, atau isu kalibrasi, akan dipantau oleh juruteknik bertauliah. JNDWATER menyediakan latihan di tapak dan pentauliahan untuk mesin acuan tiupan mereka.
Berapa kerap acuan blow molding perlu diganti?
Dengan penyelenggaraan yang betul, acuan tiup PET biasanya bertahan 3-5 tahun. Ganti apabila anda melihat kilatan berterusan, ketebalan dinding tidak sekata, atau kehausan rongga yang kelihatan.
Kesimpulannya
Menukar acuan pada mesin acuan tiup adalah proses sistematik yang dibina atas keselamatan, ketepatan, dan teknik yang betul. Ikuti prosedur empat langkah — penyediaan, penyingkiran, pemasangan, dan ujian — untuk meminimumkan masa henti dan memastikan kualiti botol yang konsisten dari kitaran pertama.
Untuk maklumat lanjut Mesin acuan tiup JNDWATER, Syarikat dan pensijilan kami, atau panduan industri, terokai perpustakaan sumber kami.
Perlukan Bantuan dengan Operasi Blow Molding Anda?
Pasukan kejuruteraan JNDWATER mempunyai pengalaman 17+ tahun membantu pengeluar di seluruh dunia mengoptimumkan pengeluaran. Sama ada anda memerlukan yang baru Mesin Pengacuan Pukulan, latihan penukaran acuan, atau penyelesaian penukaran acuan yang pantas, kami sedia membantu.
17+ tahun pengalaman dalam reka bentuk, pembuatan, dan perkhidmatan teknikal mesin acuan tiup di 125+ negara. Bertauliah dalam kejuruteraan plastik dan pengurusan keselamatan industri.