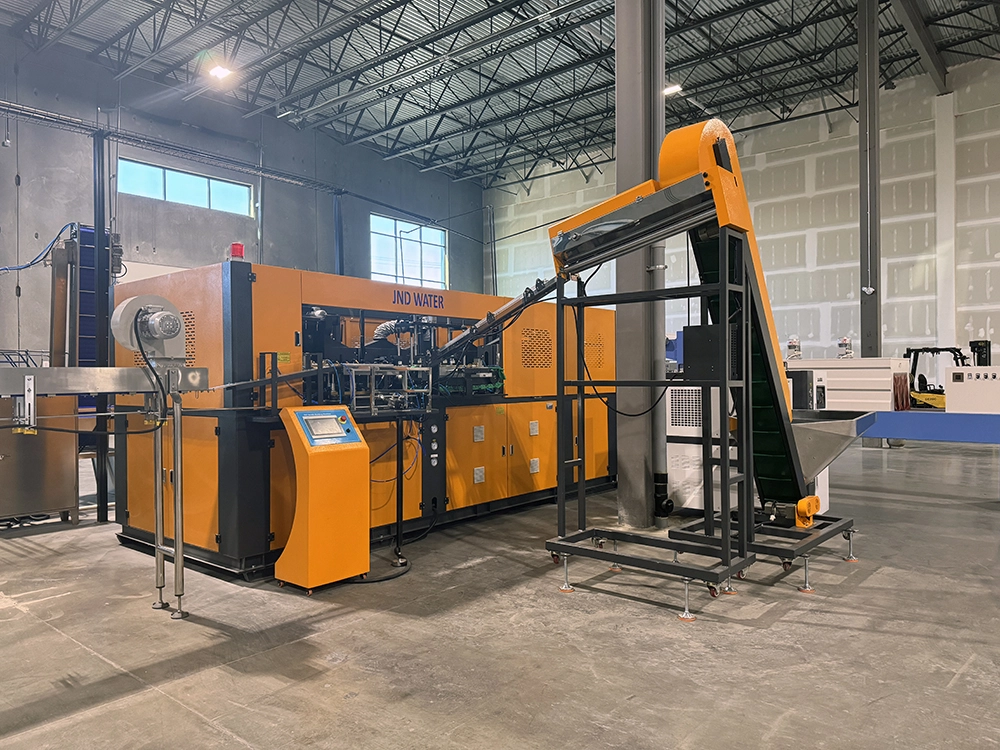
Смена форм на Выдувное формование Ma Chine — это регулярное обслуживание, которое напрямую влияет на время работы и качество бутылок. Независимо от того, используете ли вы полуавтоматический ПЭТ-надуватель JNDWATER или полностью автоматическую машину для ротационного формовки, процедура замены формы следует одним и тем же основным принципам. Это руководство проведёт вас через весь процесс — подготовку, снятие, установку, тестирование и устранение неисправностей — основываясь на 17+ годах опыта поставки 9 000+ производственных линий в 125+ стран.
Подготовка к безопасности перед заменой формы
Правильная подготовка не подлежит обсуждению. Пропуск мер безопасности может привести к травмам, повреждению оборудования и дорогостоящему простою.
ВНИМАНИЕ: Никогда не пытайтесь менять форму, пока машина включена или гидравлическая система под давлением. Всегда следуйте процедуре Lockout/Tagout (LOTO) вашего учреждения.
Необходимые инструменты
| Категория | Инструменты | Назначение |
| Ручные инструменты | Динамометрический ключ, шестигранный ключ, отвёртки, латунный молоток | Ослабление/затягивание болта, регулировки |
| Подъём сил | Контактный кран, подъемник или формовочный прибор | Безопасное обращение с плесенью |
| Уборка | Растворитель, безворсовые ткани, сжатый воздух | Очистка полостей и каналов |
| Смазочные материалы | Высокотемпературная смазка, агент для выпуска формы, ржавое масло | Смазка и защита направляющего штифта |
| СИЗ | Термостойкие перчатки, очки, ботинки со стальными носками | Личная защита |
Процедура отключения машины
- Остановка производства и позволяет диапазонам обогрева охлаждаться ниже 50°C (122°F).
- Разгерметизация Гидравлическая система и проверьте, что индикатор показывает ноль.
- Локаут/Тагаут — отключить основное питание и включить замок.
- Слив охлаждающей воды от каналов с плесенью до отключения линий.
Шаг 1 — Удалить старую плесень
Начните с маркировки каждого соединения (охлаждающих линий, воздушных шлангов, проводки обогревателя, термопар) цветной лентой или пронумерованными метками — это предотвратит путаницу при повторной установке. Сделайте фото перед тем, как отключиться.
Ослабляйте болты по диагональному узору
Постепенно ослабляйте крепящие болты Диагональный (звёздный) узор — никогда по очереди по периметру. Это предотвращает зацепление формы на направляющих штифтах. Ослабьте каждый болт на четверть оборота, затем переходите к противоположному, пока все не будут свободны вручную. Храните болты в маркированном контейнере.
ПРОФЕССИОНАЛЬНЫЙ СОВЕТ: Самая распространённая ошибка — ослабление болтов по кругу. Это неравномерно смещает форму и зажимает направляющие штифты. Всегда работайте по диагонали.
Поднимать и хранить старую форму
Выдувные формы могут весить от 50 кг до более 1000 кг. Никогда не поднимайте их вручную. Прикрепите болты для подъёма к определённым точкам, убедитесь, что угол ремни ниже 60° от вертикали, и сначала поднимите на 1-2 см, чтобы проверить наличие крепления. При необходимости аккуратно постукивайте латунным молотком, чтобы сломать уплотнение — никогда не стального молотка. Храните форму на деревянном поддоне или резиновом коврике, никогда не напрямую на бетоне.
Шаг 2 — Осмотрите и подготовьте новую форму
Перед установкой убедитесь, что новая форма соответствует вашей машине. Несоответствия повреждают как плесень, так и машину.
| Проверено | Что проверять | Риск, если ошибаешься |
| Сила сжатия | Для формы требуется меньше, чем максимальный вариант для машины | Вспышка, перегрузка |
| Высота плесени | Подходит для дневного диапазона машины | Не сидеть |
| Схема крепления | Отверстия болтов совпадают с пластиной | Ненадёжная посадка |
| Длина штриха | Способствует открытию формы | Отказ при снятии формы |
| Каналы охлаждения | Диаметр соответствует фитингам | Плохое охлаждение |
Очистите полость и охлаждающие каналы растворителем и сжатым воздухом. Проведите ногтем вдоль линии раздела — он должен ощущаться идеально ровным; Любой порез вызывает вспышки. Нанесите тонкий слой смазки с дисульфидом молибдена (MoS2) на направляющие штифты и втулки. Избегайте чрезмерной смазки, которая привлекает грязь.
Шаг 3 — Установка новой формы
Выровняйте форму с направляющими штифтами и ручной затяньте два диагональных болта, затем вставьте остальное. Это самый важный шаг — неправильный крутящий момент вызывает проблемы с качеством после смены.
| Перевал | Уровень крутящего момента | Бой |
| 1 | 30% от спецификации | Затяньте все болты в поперечном узоре |
| 2 | 70% спецификации | Затянуть ту же схему |
| 3 | 100% спецификации | Финальный крутящий момент с помощью ключа типа «щелчок» |
ВНИМАНИЕ: Всегда следуйте таблице крутящего момента вашей машины. Типичные значения варьируются от 80 Нм (M12) до 340 Нм (M20). Неправильный крутящий момент может привести к отказу болта во время производства.
Подключите линии в обратном порядке удаления (электрические → воздух → вода), используя ваши этикетки и фотографию. Откройте водопровод и проверьте все фитинги на протечки. Удалите устройства LOTO и восстановите питание.
Шаг 4 — Тестирование и калибровка
Запусти Цикл тестирования без нагрузки Сначала проверить выравнивание без материала. Затем произведите 5-10 пробных бутылок на пониженной скорости и проведите осмотр на:
- Вспышка — избыточный материал на линии разъединения (проблемы с болтами или давлением)
- Неравномерная толщина стенок — проблема с коэффициентом растяжения или температурой
- Искажение — проблема с охлаждением или временем выдувки
Регулируйте давление выдувка, температуру и время обработки до тех пор, пока образцы не станут стабильными. Задокументируйте все параметры в журнале перехода, чтобы ускорить следующее изменение.
Изменение формы по типу машины
JNDWATER предлагает несколько типов машин для формовки с выдувкой, каждый из которых имеет небольшие различия в замене формы:
| Машина | Заметки об изменении плесени |
| Полуавтоматический ПЭТ | Ручная загрузка формы, одинарная или двойная полость, 30-60 минут. Идеально подходит для бутылок объемом 0,5-10 литров. |
| Полностью автоматическая роторная система | Интегрированная нагревательная духовка и серво-зажимы; Замена плесени с помощью быстро замыкающихся пластин, 60-120 минут. |
| 5-галлонные / 4-литровые машины | Крупные формы требуют работы с краном; Проверьте более широкий дневной отверстие. |
Системы быстрой смены формы (QMC)
Если вы меняете формы более 2-3 раз в неделю, то Система быстрой замены формы Оплачивает себя. Безинструментальные быстрозамыкающие механизмы, самозапечатывающиеся гидромуфты и регулировки сервоприводов сокращают смену времени с часов до менее чем 30 минут. Для линий с высоким содержанием смеси, производящих несколько размеров бутылок, QMC обычно восстанавливает десятки часов производства в месяц, а окупаемость составляет 6-15 месяцев.
Распространённые проблемы после смены плесени
| Проблема | Вероятная причина | Исправление |
| Вспышка на линии разъединения | Болты подтягивались; Минимальная сила зажима | Болты рекрутного момента; Повышение давления зажима |
| Неравномерная толщина стенок | Коэффициент растяжения отключён; Температура неравномерна | Регулировать нагрев преформа; Проверьте стретч-стержень |
| Сложности с разбором формы | Недостаточное охлаждение от плесени; Проблема с эжектором | Увеличение времени охлаждения; Проверьте выбросные штифты |
| Протечка воды | Линия охлаждения не герметизирована | Затяжка фитингов; заменить уплотнительное кольцо |
Хранение и уход за плесенью
- Хранение: Держите плесень в сухом месте с контролируемой температурой на поддонах; Никогда на бетоне.
- Профилактика ржавчины: Наносите масло против ржавчины на поверхности полости между использованиями.
- Чистка: Промывайте каналы охлаждения ежемесячно, чтобы предотвратить накопление масштабов.
- Смазка: Пересмазывайте направляющие штифты каждые 3 месяца или 500 циклов.
- Осмотр: Проверяйте прокладку и вентиляционные отверстия перед каждой установкой.
Часто задаваемые вопросы
Сколько времени занимает замена формы на машине для выдувного формовки?
Для полуавтоматической ПЭТ-выдувной машины — около 30-60 минут. Полностью автоматические роторные машины могут занимать от 60 до 120 минут. Система QMC сокращает этот срок до 15-30 минут.
Какие инструменты нужны для замены формы для машины для выдувного формовки?
Основные инструменты включают динамометрический ключ, набор ключей Allen, отвёртки, латунный молоток, подъемник или кран для тяжёлых форм, чистящие тряпки, средство для снятия формы и смазочную смазку для высоких температур.
Могу ли я менять форму самостоятельно или мне нужен техник?
Обученные операторы могут выполнять стандартную замену формы в соответствии с инструкцией. Для замены с первого раза, сложных многорезонансных форм или проблем с калибровкой за ними наблюдает сертифицированный техник. JNDWATER обеспечивает обучение на месте и ввод в эксплуатацию своих машин для выдувного формования.
Как часто следует менять формы для выдувного формования?
При правильном уходе ПЭТ-выдувные формы обычно служат 3-5 лет. Меняйте, если заметите постоянную вспышку, неравномерную толщину стенок или видимый износ полости.
Заключение
Смена форм на машине для выдувного литья — это систематический процесс, основанный на безопасности, точности и правильной технике. Следуйте четырёхэтапной процедуре — подготовка, снятие, установка и тестирование — чтобы минимизировать простои и обеспечить стабильное качество бутылки с первого цикла.
Подробнее о Машины для формовки JNDWATER, Наша компания и сертификаты, или Отраслевые путеводители, изучите нашу библиотеку ресурсов.
Нужна помощь с операцией по выдувному формованию?
Инженерная команда JNDWATER имеет 17+ лет опыта помощи производителям по всему миру в оптимизации производства. Нужен ли вам новый Выдувная машина, обучение по изменению плесени или быстрое решение — мы готовы помочь.
17+ лет опыта в проектировании, производстве и техническом обслуживании машин с выдувной формой в 125+ странах. Сертифицирован по пластмассовой инженерии и управлению промышленной безопасностью.