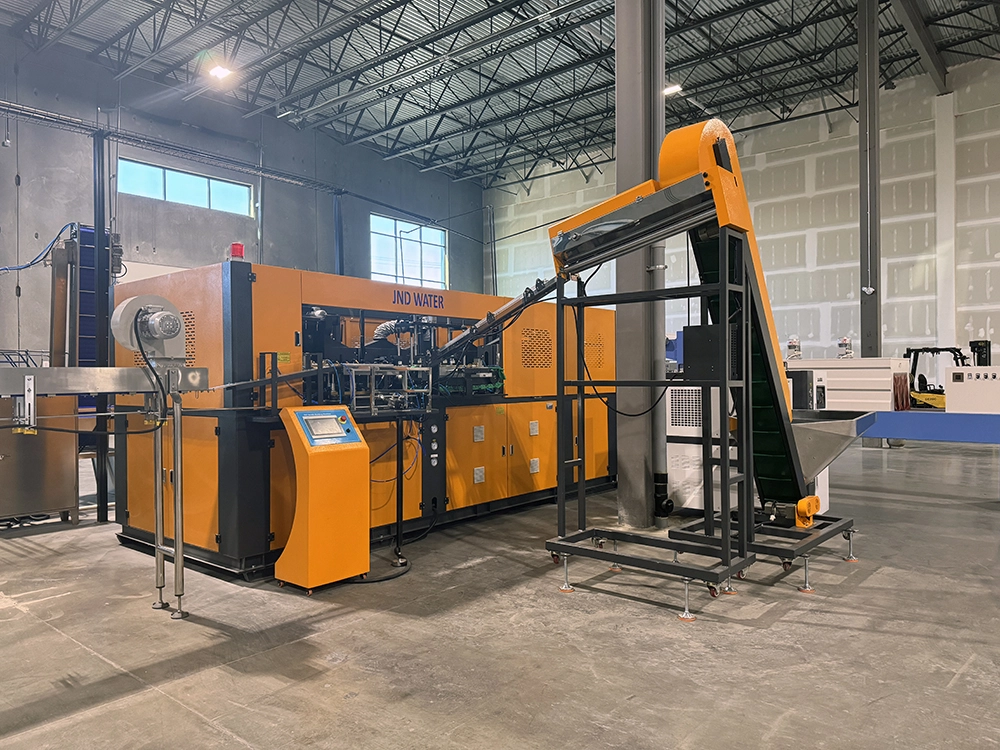
Thay đổi khuôn trên một máy thổi khuôn là việc bảo trì định kỳ ảnh hưởng trực tiếp đến thời gian hoạt động sản xuất và chất lượng chai. Dù bạn sử dụng máy thổi PET bán tự động JNDWATER hay máy thổi khuôn quay tự động hoàn toàn, quy trình thay khuôn đều tuân theo các nguyên tắc cốt lõi giống nhau. Hướng dẫn này sẽ hướng dẫn bạn qua toàn bộ quy trình — chuẩn bị, tháo dỡ, lắp đặt, kiểm tra và khắc phục sự cố — dựa trên 17+ năm kinh nghiệm thực địa cung cấp 9.000+ dây chuyền sản xuất cho 125+ quốc gia.
Chuẩn bị an toàn trước khi thay khuôn
Chuẩn bị đúng cách là điều không thể thương lượng. Bỏ qua các bước an toàn có thể gây chấn thương, hư hỏng thiết bị và mất thời gian ngừng hoạt động tốn kém.
CẢNH BÁO: Không bao giờ thử thay khuôn khi máy đang bật hoặc hệ thống thủy lực đang được tăng áp. Luôn tuân thủ quy trình Lockout/Tagout (LOTO) của cơ sở bạn.
Dụng cụ cần thiết
| Danh mục | Dụng cụ | Mục đích |
| Dụng cụ cầm tay | Cờ lê mô-men xoắn, bộ chìa khóa Allen, tua vít, búa đồng thau | Nới/siết bu lông, điều chỉnh |
| Nâng tạ | Cần cẩu trên cao, cẩu nâng hoặc thiết bị khuôn | Xử lý khuôn an toàn |
| Làm sạch | Dung môi, khăn không xơ vải, khí nén | Làm sạch khoang và kênh |
| Chất bôi trơn | Mỡ chịu nhiệt cao, chất giải phóng khuôn, dầu rỉ sét | Bôi trơn chân dẫn hướng, bảo vệ |
| PPE | Găng tay chịu nhiệt, kính bảo hộ, ủng mũi thép | Bảo vệ cá nhân |
Quy trình tắt máy
- Ngừng sản xuất và để các dải nhiệt nguội xuống dưới 50°C (122°F).
- giảm áp suất Hệ thống thủy lực và kiểm tra đồng hồ đo cho thấy bằng không.
- Lockout/Tagout — ngắt nguồn điện chính và khóa lại.
- Xả nước làm mát từ các rãnh khuôn trước khi ngắt kết nối đường ống.
Bước 1 — Loại bỏ khuôn cũ
Hãy bắt đầu bằng cách dán nhãn cho mọi kết nối (đường làm mát, ống dẫn khí, dây điện sưởi, cặp nhiệt điện) bằng băng keo màu hoặc thẻ đánh số — điều này giúp tránh nhầm lẫn khi lắp đặt lại. Chụp ảnh trước khi ngắt kết nối.
Nới lỏng bu lông theo đường chéo
Nới lỏng bu lông gắn dần dần trong một hoa văn chéo (ngôi sao) — không bao giờ theo thứ tự quanh chu vi. Điều này ngăn khuôn bị dính vào các chốt dẫn hướng. Nới lỏng từng bu lông một phần tư vòng, tiếp theo làm việc với bu lông đối diện, cho đến khi tất cả đều lỏng tay. Bảo quản bu lông trong hộp có nhãn.
MẸO CHUYÊN NGHIỆP: Lỗi phổ biến nhất trong trường là nới lỏng bu lông theo hình tròn. Điều này làm khuôn bị dịch chuyển không đều và kẹp các chốt dẫn hướng. Luôn làm theo đường chéo.
Gỡ bỏ và lưu trữ khuôn cũ
Khuôn thổi có thể nặng từ 50 kg đến hơn 1.000 kg. Không bao giờ nâng thủ công. Gắn bu lông mắt nâng vào các điểm được chỉ định, kiểm tra góc dây đeo dưới 60° so với phương thẳng đứng, và nâng lên 1-2 cm trước để kiểm tra độ bám dính. Gõ nhẹ bằng búa đồng thau để phá niêm phong nếu cần — không bao giờ dùng búa thép. Bảo quản khuôn trên pallet gỗ hoặc thảm cao su, không bao giờ đặt trực tiếp lên bê tông.
Bước 2 — Kiểm tra và chuẩn bị khuôn mới
Xác minh khuôn mới phù hợp với máy của bạn trước khi lắp đặt. Sự không khớp làm hỏng cả khuôn và máy.
| Kiểm tra | Những gì cần xác minh | Rủi ro nếu sai |
| Lực kẹp | Khuôn chỉ cần tối đa số lượng máy | Nhấp nháy, quá tải |
| chiều cao khuôn | Phù hợp với dòng sản phẩm ánh sáng ban ngày của máy | Không thể gắn lên |
| Mẫu lắp đặt | Lỗ bu lông khớp với platen | Vừa vặn không chắc chắn |
| chiều dài hành trình | Hỗ trợ mở khuôn | Thất bại khi tháo khuôn |
| Kênh làm mát | Đường kính khớp với phụ kiện | Làm mát kém |
Làm sạch khoang và các kênh làm mát bằng dung môi và khí nén. Dùng móng tay chạy dọc theo đường chia — nó sẽ cảm thấy phẳng hoàn hảo; Bất kỳ vết xước nào cũng gây ra ánh sáng. Thoa một lớp mỏng mỡ molybdenum disulfide (MoS2) lên các chốt dẫn hướng và các ống lót. Tránh bôi mỡ quá nhiều, vì chúng sẽ thu hút bụi bẩn.
Bước 3 — Lắp đặt khuôn mới
Căn chỉnh khuôn với các chốt dẫn hướng và siết chặt tay hai bu lông chéo, sau đó lắp các chốt còn lại. Đây là bước quan trọng nhất — mô-men xoắn không đúng sẽ gây ra vấn đề chất lượng sau khi chuyển đổi.
| Bỏ qua | Mức mô-men xoắn | Hành động |
| 1 | 30% thông số kỹ thuật | Ôm chặt tất cả các bu lông theo kiểu chéo |
| 2 | 70% thông số kỹ thuật | Siết chặt cùng một mẫu |
| 3 | 100% đúng thông số kỹ thuật | Mô-men xoắn cuối cùng với cờ lê kiểu click |
LƯU Ý: Luôn tuân theo biểu đồ mô-men xoắn của máy. Giá trị điển hình dao động từ 80 Nm (M12) đến 340 Nm (M20). Mô-men xoắn sai có thể gây hỏng bu-lông trong quá trình sản xuất.
Kết nối lại các đường dây theo thứ tự ngược lại (điện → không khí → nước), sử dụng nhãn và ảnh của bạn. Mở nguồn nước và kiểm tra mọi đầu nối xem có rò rỉ không. Tháo các thiết bị LOTO và khôi phục nguồn điện.
Bước 4 — Kiểm tra và Hiệu chuẩn
Chạy một Chu trình kiểm tra không tải Đầu tiên là xác minh căn chỉnh mà không cần vật liệu. Sau đó sản xuất 5-10 chai mẫu với tốc độ giảm và kiểm tra:
- Flash — vật liệu dư thừa tại đường phân tách (bu lông hoặc vấn đề áp lực)
- Độ dày thành không đều — tỷ lệ giãn hoặc vấn đề nhiệt độ
- biến dạng — vấn đề làm mát hoặc thời gian thổi
Điều chỉnh áp suất thổi, nhiệt độ và thời điểm thổi cho đến khi mẫu đồng nhất. Ghi lại tất cả các tham số trong nhật ký chuyển đổi để tăng tốc thay đổi tiếp theo.
Thay đổi khuôn theo loại máy
JNDWATER cung cấp nhiều loại máy thổi khuôn, mỗi loại có sự khác biệt nhỏ trong việc thay khuôn:
| Máy móc | Ghi chú thay đổi khuôn |
| PET bán tự động | Tải khuôn thủ công, khoang đơn hoặc đôi, 30-60 phút. Lý tưởng cho chai 0.5-10L. |
| Quay tự động hoàn toàn | Lò sưởi tích hợp và kẹp servo; Thay đổi khuôn bằng tấm khóa nhanh, 60-120 phút. |
| Máy 5 gallon / 4L | Khuôn lớn hơn cần cần cẩu xử lý; Kiểm tra lỗ mở rộng hơn của ánh sáng ban ngày. |
Hệ thống Thay Đổi Khuôn Nhanh (QMC)
Nếu bạn thay đổi khuôn nhiều hơn 2-3 lần mỗi tuần, Hệ thống thay khuôn nhanh tự trả lại chi phí. Cơ chế khóa nhanh không cần dụng cụ, khớp nối chất lỏng tự làm kín và điều chỉnh servo giúp giảm thời gian chuyển đổi từ vài giờ xuống dưới 30 phút. Đối với các dây chuyền pha trộn cao sản xuất nhiều kích thước chai, QMC thường thu hồi hàng chục giờ sản xuất mỗi tháng, hoàn vốn trong 6-15 tháng.
Các vấn đề phổ biến sau khi thay đổi khuôn
| Vấn đề | nguyên nhân có thể xảy ra | Sửa lỗi |
| Đèn flash tại đường phân chia | Bu lông bị thiếu mô-men xoắn; lực kẹp thấp | Bu lông lực xoắn; tăng áp lực kẹp |
| Độ dày thành không đều | Giảm tỷ lệ kéo giãn; Nhiệt độ không đều | Điều chỉnh nhiệt preform; thanh căng kiểm tra |
| Khó khăn khi tháo khuôn | Làm mát khuôn không đủ; vấn đề bộ phóng | Tăng thời gian làm mát; kiểm tra chân đẩy |
| Rò rỉ nước | Đường làm mát không được bịt kín | Siết lại các khớp nối; thay thế vòng đệm O-ring |
Lưu trữ và Bảo trì khuôn
- Lưu trữ: Giữ khuôn ở nơi khô ráo, kiểm soát nhiệt độ trên pallet; Không bao giờ trên nền bê tông.
- Phòng chống rỉ sét: Thoa dầu chống rỉ sét lên bề mặt khoang giữa các lần sử dụng.
- Hấp: Xả các kênh làm mát hàng tháng để ngăn ngừa tích tụ cặn.
- Bôi trơn: Thay chân dẫn dầu mỡ mỗi 3 tháng hoặc 500 chu kỳ.
- Kiểm tra: Kiểm tra đường chia và lỗ thông gió trước mỗi lần lắp đặt lại.
Những câu hỏi thường gặp
Mất bao lâu để thay khuôn trên máy thổi khuôn?
Đối với máy thổi PET bán tự động, khoảng 30-60 phút. Máy quay tự động hoàn toàn có thể mất từ 60-120 phút. Hệ thống QMC giảm thời gian này xuống còn 15-30 phút.
Cần những dụng cụ gì để thay khuôn máy thổi?
Các dụng cụ thiết yếu bao gồm cờ lê mô-men xoắn, bộ chìa khóa Allen, tua vít, búa đồng, cần cẩu hoặc cần cẩu cho khuôn nặng, khăn lau, chất giải phóng khuôn và mỡ bôi trơn ở nhiệt độ cao.
Tôi có thể tự thay khuôn hay cần kỹ thuật viên?
Những người vận hành được đào tạo có thể thực hiện các thay đổi khuôn tiêu chuẩn theo hướng dẫn sử dụng. Đối với các thay đổi lần đầu, khuôn nhiều khoang phức tạp hoặc các vấn đề hiệu chuẩn, sẽ có kỹ thuật viên được chứng nhận giám sát. JNDWATER cung cấp đào tạo và vận hành tại chỗ cho các máy thổi khuôn của mình.
Khuôn thổi nên được thay thế bao lâu một lần?
Với bảo trì đúng cách, khuôn thổi PET thường dùng được từ 3-5 năm. Thay thế khi bạn thấy hiện tượng nhấp nháy kéo dài, độ dày thành không đều hoặc mòn khoang răng rõ ràng.
Kết luận
Thay khuôn trên máy thổi khuôn là một quy trình hệ thống dựa trên an toàn, độ chính xác và kỹ thuật đúng đắn. Thực hiện quy trình bốn bước — chuẩn bị, tháo ra, lắp đặt và kiểm tra — để giảm thiểu thời gian ngừng hoạt động và đảm bảo chất lượng chai ổn định ngay từ chu kỳ đầu tiên.
Tìm hiểu thêm về Máy thổi khuôn JNDWATER, Công ty và các chứng nhận của chúng tôi, hoặc hướng dẫn ngành, khám phá thư viện tài nguyên của chúng tôi.
Cần giúp đỡ với hoạt động thổi khuôn của bạn?
Đội ngũ kỹ thuật của JNDWATER có 17+ năm kinh nghiệm giúp các nhà sản xuất trên toàn thế giới tối ưu hóa sản xuất. Bạn có cần một chiếc mới hay không Máy thổi, đào tạo thay đổi khuôn hoặc giải pháp thay đổi nhanh chóng, chúng tôi luôn sẵn sàng hỗ trợ.
17+ năm kinh nghiệm trong thiết kế, sản xuất và dịch vụ kỹ thuật máy thổi tại 125+ quốc gia. Được chứng nhận về kỹ thuật nhựa và quản lý an toàn công nghiệp.